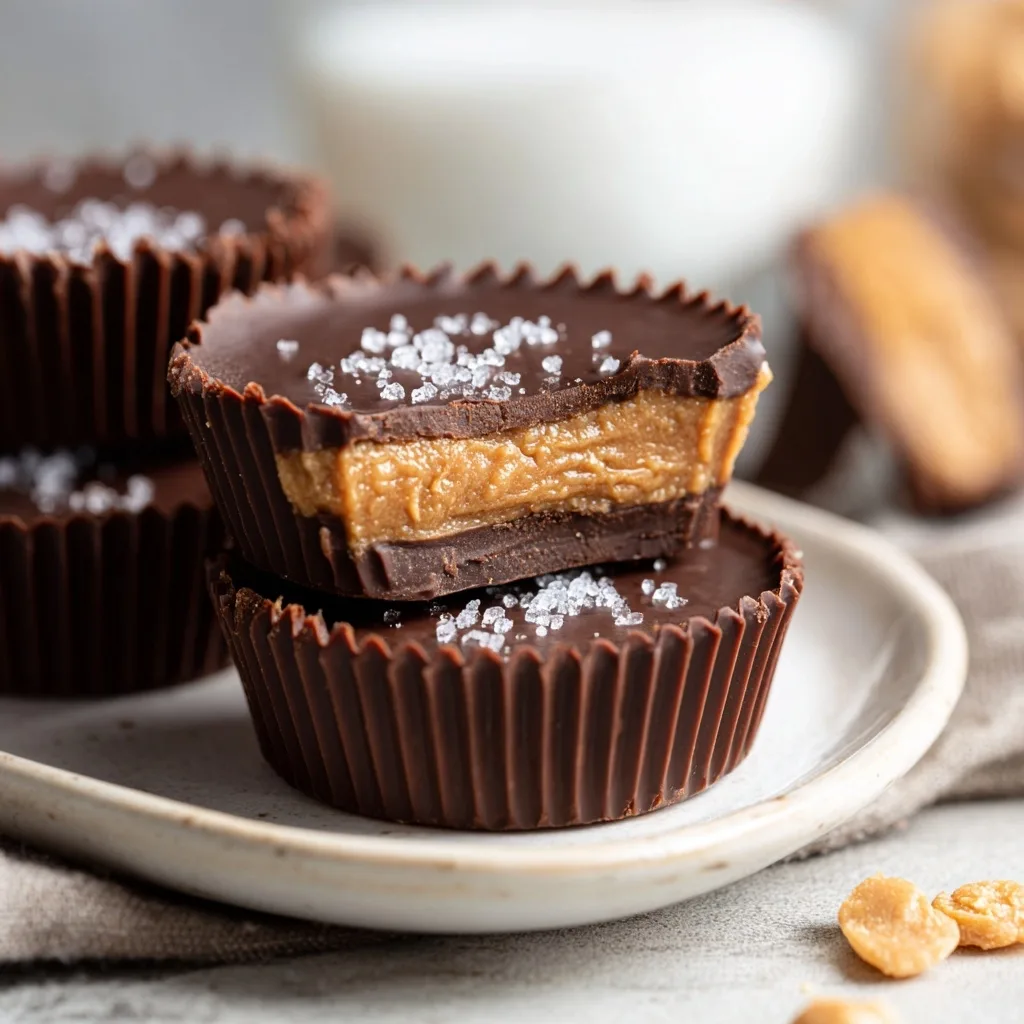
I remember the day I first tried making protein peanut butter cups. It was a rainy afternoon, and I was craving something sweet yet satisfying, so I whipped up a batch of these protein peanut butter cups. The moment I took my first bite, I was hooked—the creamy peanut butter, rich chocolate, and a protein boost all in one delicious treat.
What sets this recipe apart from others is the perfect balance of flavor and nutrition. I’ve experimented with different ingredients to achieve a texture that’s both smooth and decadent while packing in the protein. These cups are not just a snack; they're a guilt-free indulgence that leaves you feeling energized and satisfied.
Why You'll Love This Recipe
- Natural Peanut Butter’s Creaminess: The natural oils in peanut butter create a rich, velvety texture that binds all the ingredients together smoothly. I used both creamy and crunchy varieties, and the creamy version gave a smoother mouthfeel while the crunchy added delightful bits of texture.
- Coconut Oil’s Structure: Melted coconut oil solidifies when cooled, helping the peanut butter cups hold their shape after chilling. I found that using a bit extra ensures a firmer texture, making it easier to bite into without falling apart.
- Protein Powder’s Density: The protein powder adds not just flavor but also density, making these treats more filling without extra sugar. I tested both vanilla and chocolate flavors, and the chocolate provided a richer taste that balanced beautifully with the peanut butter.
- Dark Chocolate’s Bitterness: The dark chocolate coating adds a hint of bitterness that perfectly contrasts the sweetness of the peanut butter filling. I had a batch where I used semi-sweet chocolate, but the dark chocolate really enhanced the overall flavor profile.
Ingredients
What You'll Need
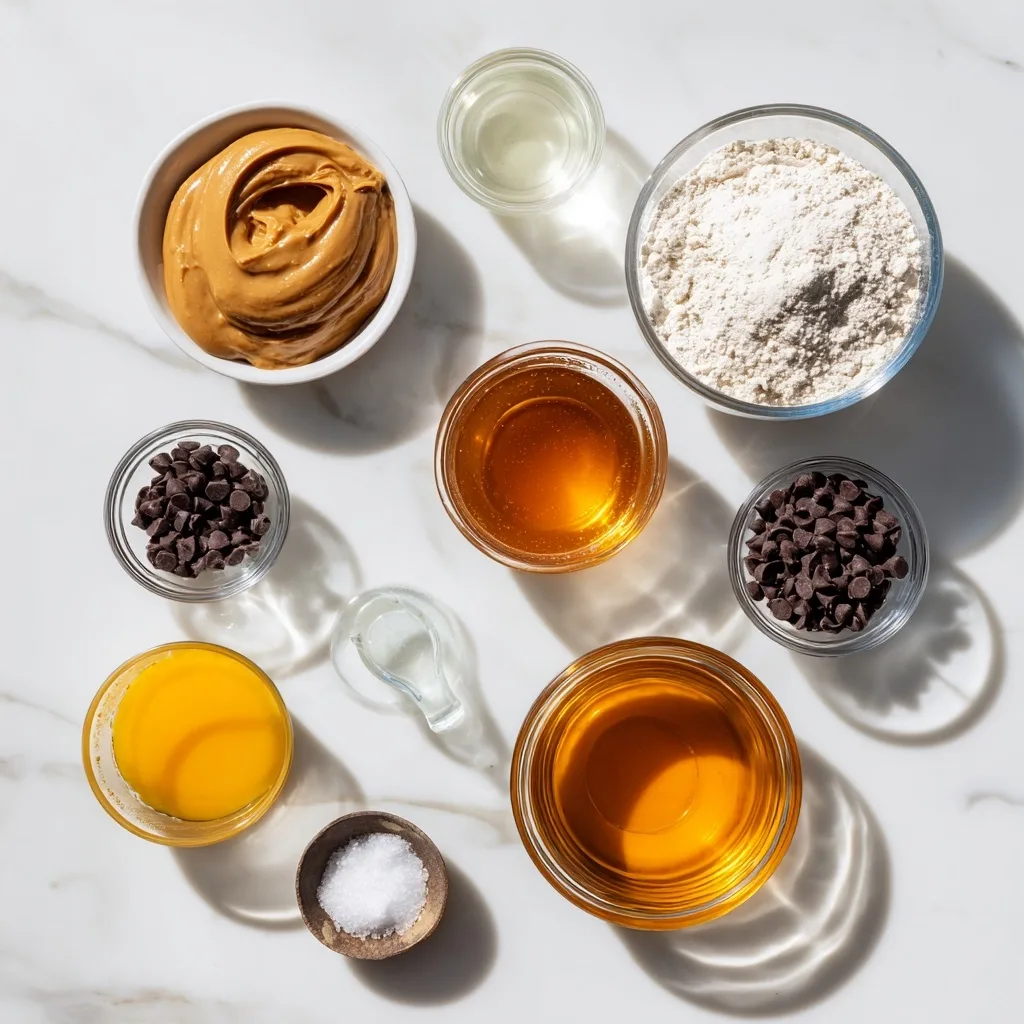
- 1 cup natural peanut butter: creamy or crunchy works; choose natural for a richer flavor and no added sugars
- 1/2 cup protein powder: vanilla or chocolate flavored will enhance the taste; opt for a brand you love
- 1/4 cup honey: or maple syrup for a vegan option; this adds sweetness and binds the mixture
- 1/4 cup coconut oil: melted; it helps create a smooth texture and adds healthy fats
- 1/2 tsp vanilla extract: for depth of flavor; pure extract is best for a natural taste
- 1/4 tsp salt: optional; it enhances the flavors, so adjust according to your taste
- 1 cup dark chocolate chips: choose vegan if desired; bittersweet chocolate balances the sweetness of the filling
- 1 tbsp coconut oil: for melting chocolate; it helps achieve a smooth, glossy finish
When shopping for your ingredients, look for high-quality natural peanut butter to get that rich, nutty flavor. Brands like Jif or Skippy work well, but I love using freshly ground peanut butter from the store. The right protein powder can also make a difference in taste and texture, so choose one that complements your palate.
Easy Substitutions
- Dairy-free: swap regular chocolate chips for dairy-free chocolate chips — this maintains the same rich flavor without any dairy.
- Gluten-free: use gluten-free protein powder — it will keep the recipe gluten-free without compromising on texture or taste.
- Lower calorie: replace honey with a zero-calorie sweetener — the sweetness is there, but the texture may be slightly less creamy.
How to Make This Recipe
Prep & Mix
In a large mixing bowl, combine 1 cup of peanut butter, 1 scoop of protein powder, 2 tablespoons of honey, 2 tablespoons of melted coconut oil, 1 teaspoon of vanilla extract, and a pinch of salt. Mixing well until smooth is crucial, as it creates a creamy texture that binds everything together.
Line a muffin tin with paper liners, which makes it easy to remove the cups later. This step is essential for keeping your treats intact when serving.
Spoon 2 tablespoons of the peanut butter mixture into each muffin liner, spreading it evenly. The mixture should be smooth to the touch, and this even layer will ensure uniform flavor and texture in every bite.
Place the muffin tin in the freezer for 15 minutes. This helps the peanut butter layer set properly, making it easier to pour the chocolate on top later.
Chocolate Layer
While the cups are setting, melt 1 cup of dark chocolate chips with 1 tablespoon of coconut oil in a microwave-safe bowl. Heat in 30-second intervals, stirring in between until smooth. This method prevents the chocolate from burning and gives you a silky finish.
Remove the muffin tin from the freezer and pour the melted chocolate evenly over each peanut butter layer, filling to the top. The chocolate should flow smoothly, creating a smooth top layer that contrasts beautifully with the creamy peanut butter.
Return the muffin tin to the freezer for an additional 10 minutes to allow the chocolate to set. You’ll know it’s ready when the tops appear firm and shiny.
Serve
Once set, carefully remove the peanut butter cups from the muffin tin by peeling away the paper liners. Enjoy your Protein Peanut Butter Cups chilled or at room temperature for the best flavor experience!
Tips & Tricks
Choose the Right Chocolate
When melting chocolate for these Protein Peanut Butter Cups, opt for high-quality dark chocolate chips with at least 60% cocoa. The richer the chocolate, the better the contrast with the creamy peanut butter filling. I learned the hard way that using low-quality chocolate can lead to a waxy texture that masks the delicious flavors of your cups. Trust me, you want that smooth, glossy finish that only the good stuff can provide.
Keep it Cool
After pouring the melted chocolate over the peanut butter mixture, return the muffin tin to the freezer for optimal setting. This step is crucial because it helps the layers bond together perfectly. I once skipped this and ended up with a messy cup that fell apart when I tried to unwrap it. A little patience goes a long way—just let them chill until the chocolate is firm for a satisfying bite every time.
Pro Tips
- Use a Silicone Muffin Tin: Silicone muffin tins make removing your Protein Peanut Butter Cups a breeze. They’re flexible, so you can easily push them out without damaging the cups. I’ve had less success with metal tins, which can sometimes leave the chocolate cracked.
- Chill the Peanut Butter Mixture: Before spooning the peanut butter mixture into the muffin liners, chill it in the refrigerator for about 10-15 minutes. This helps it firm up, making it less likely to mix with the chocolate when you pour it on top. Trust me, it keeps those layers distinct and beautiful!
- Experiment with Flavor Add-ins: Try adding a pinch of cinnamon or a few drops of almond extract to the peanut butter mixture for a flavor twist. I love the warmth of cinnamon paired with the chocolate; it adds a cozy depth that’s unexpected and delightful.
- Let Chocolate Cool Slightly: After melting the chocolate, let it cool for a few minutes before pouring it over the peanut butter. If it's too hot, it can melt the peanut butter layer and ruin that gorgeous separation. I learned this the hard way—nobody wants a chocolate-peanut butter swirl instead of neat layers!
Variations & Customizations
Flavor Twists
Chocolate Mint
Mix in ½ teaspoon peppermint extract and top with crushed peppermint candies before the chocolate sets. The result is a refreshing, cool flavor that reminds you of a classic mint chocolate treat, with a pleasureful crunch from the candy.
Spicy Peanut Butter
Add 1 teaspoon cayenne pepper to the peanut butter mixture. This variation brings a surprising heat that complements the creamy texture, creating a bold and exciting flavor profile that will wake up your taste buds.
Seasonal Versions
Pumpkin Spice
Incorporate ½ cup pumpkin puree and 1 teaspoon pumpkin pie spice into the peanut butter mixture. This variation gives a warm, cozy flavor reminiscent of fall, with a slightly denser texture that’s perfect for the season.
Chocolate Raspberry
Add ½ cup fresh raspberries or ¼ cup raspberry jam before pouring into molds. The tartness of the raspberries cuts through the richness, offering a vibrant color and a touch of fruity goodness with every bite.
Storage & Meal Prep
How to Store
Room Temperature
Your Protein Peanut Butter Cups can last up to 2 days at room temperature, but it's key to keep them in an airtight container. This prevents them from drying out and maintains that lovely creamy texture.
Refrigerator
If you want to keep them fresh for a week, store your cups in the fridge in a sealed container. Make sure they cool completely before wrapping them individually in parchment paper to prevent them from sticking together.
Freezer
In the freezer, these delicious treats will last for about 2 months. I recommend flash freezing them on a sheet pan first, then wrapping each cup in plastic wrap for the best results. When you’re ready to enjoy, just let them thaw in the fridge for a few hours or at room temperature for about 30 minutes.
Meal Prep
For a practical batch cooking strategy, I suggest doubling the recipe. Preparing them on the weekend means you’ll have tasty snacks ready for the week ahead. Store them in that airtight container for up to a week in the fridge. When you're ready to enjoy, just grab one and savor that creamy goodness!
Equipment You'll Need
Essential
Muffin tin: A sturdy muffin tin is crucial for shaping your peanut butter cups. Silicone ones make it easier to pop out the cups, while metal tins yield a firmer structure. I prefer the metal type for this recipe because they hold the shape well during freezing.
Microwave-safe bowl: This bowl is essential for melting the chocolate and coconut oil. Choose one that’s deep enough to prevent splatters when you stir. A glass bowl retains heat well, ensuring a smooth melting process, while plastic can warp if overheated.
Nice to Have
Silicone spatula: Having a silicone spatula helps in scraping every last bit of that delicious peanut butter mixture from the bowl. It’s flexible and won’t scratch the bowl, allowing you to mix thoroughly and minimize waste.
Frequently Asked Questions
Can I use almond butter instead of peanut butter?
Yes, almond butter can be used as a substitute for peanut butter. Just keep in mind that it may alter the flavor slightly, giving you a nuttier taste.
Why did my protein peanut butter cups turn out too soft?
If your cups are too soft, it could be due to not chilling them long enough. Make sure to refrigerate them for at least an hour to firm up properly.
What can I add for extra flavor?
You can mix in a pinch of sea salt or some crushed nuts for added texture and flavor. A sprinkle of cinnamon or a splash of vanilla can also enhance the taste.
How can I make these vegan?
To make these cups vegan, use dairy-free chocolate and ensure the protein powder is plant-based. Most natural peanut butters are already vegan-friendly!
Can I make these ahead of time?
Absolutely! These protein peanut butter cups store well in the fridge for up to a week, making them perfect for meal prep. Just keep them in an airtight container to maintain freshness.
These Protein Peanut Butter Cups have become my favorite guilt-free treat, perfect for satisfying that sweet craving while packing a protein punch. For an extra flavor boost, consider adding a sprinkle of sea salt on top before they set. I'd love to hear how yours turn out — give them a try, leave a comment, or share your creations on Pinterest!