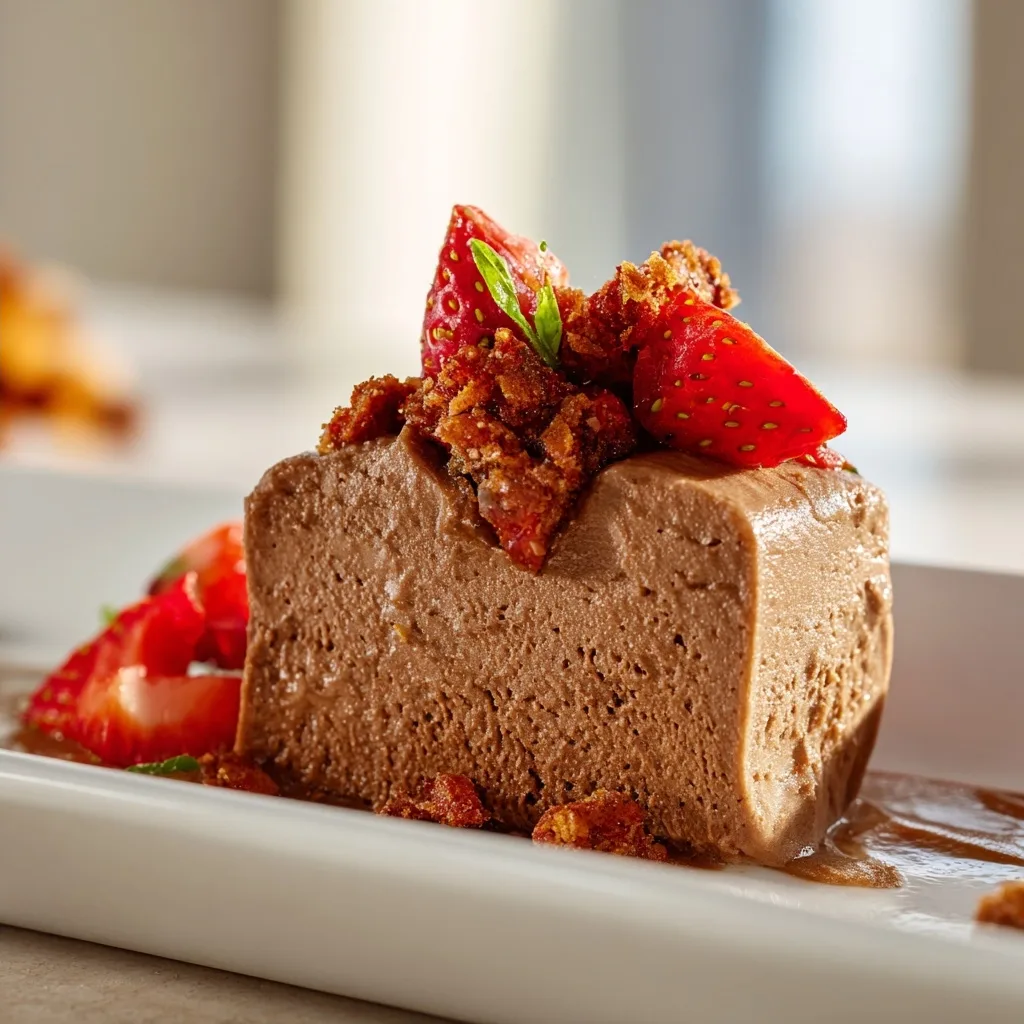
One rainy afternoon, I found myself craving something rich but healthy. That’s when I whipped up this high protein chocolate mousse using creamy Greek yogurt, and let me tell you, it was a great option! The rich, velvety texture and deep chocolate flavor made it hard to believe it was a nutritious treat.
This recipe sets itself apart by balancing indulgence with health, making it perfect for satisfying your sweet tooth without the guilt. The secret? The Greek yogurt adds protein while keeping it light and airy, so you can enjoy every spoonful without a second thought.
Why You'll Love This Recipe
- Greek Yogurt Adds Creaminess: The tangy flavor and thick consistency of Greek yogurt create a smooth base, giving the mousse its rich texture without excessive calories.
- Silken Tofu Provides Structure: Silken tofu acts as a stabilizer, holding the mousse together while adding protein and a silky mouthfeel, which I found essential for achieving the right consistency.
- Cocoa Powder Intensifies Flavor: Sifting cocoa powder ensures it blends smoothly, enhancing the chocolate flavor without clumping, which I learned after a few batches with gritty texture.
- Espresso Powder Boosts Richness: A touch of espresso powder amplifies the chocolate notes, making the mousse taste deeper and more complex, a trick I swear by for chocolate desserts.
Ingredients
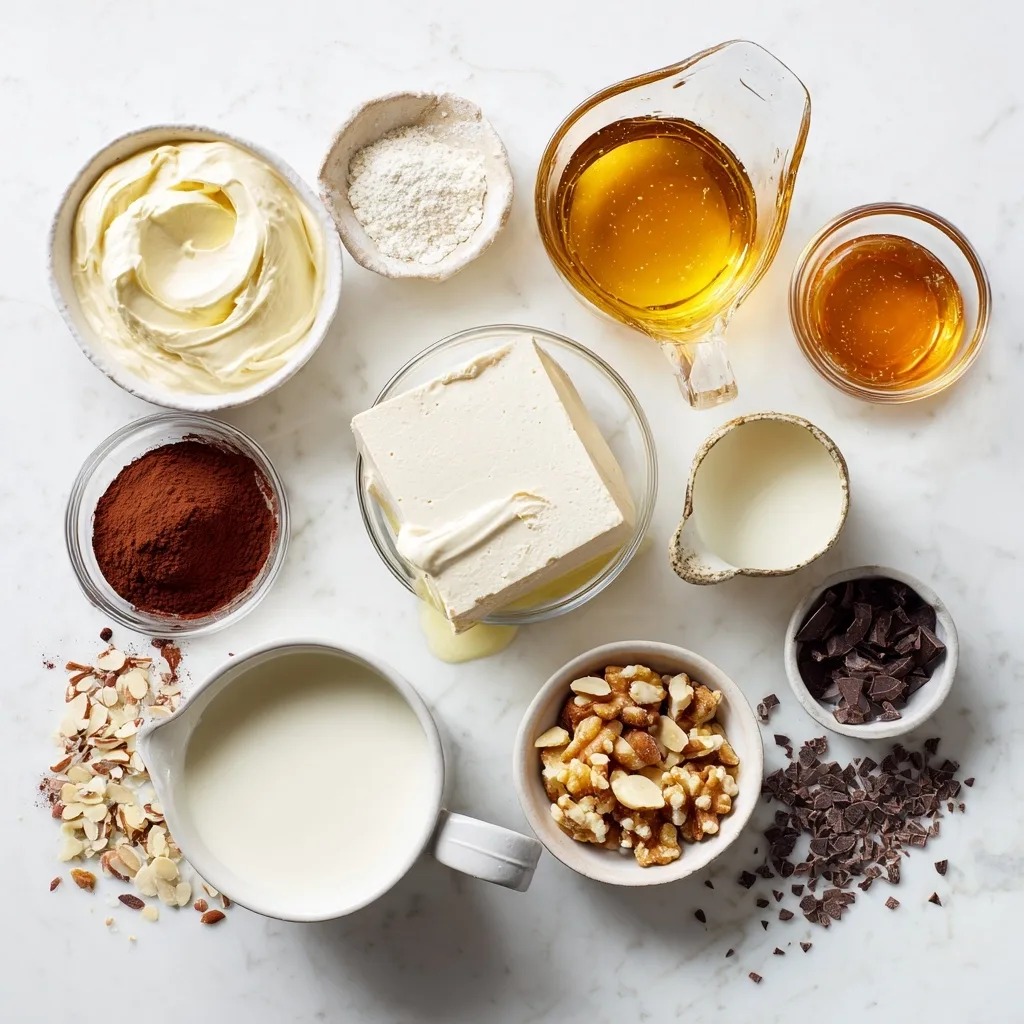
What You'll Need
- 1 cup Greek yogurt: preferably non-fat or low-fat for creaminess without excess calories
- 1 cup silken tofu: drained for a smooth texture; it adds protein while keeping the mousse light
- 1/2 cup unsweetened cocoa powder: choose high-quality cocoa for richer chocolate flavor
- 1/4 cup honey: or maple syrup for a vegan option; both add natural sweetness
- 1/4 cup milk: dairy or non-dairy options like almond or oat milk work well
- 1 tsp vanilla extract: for a warm, aromatic flavor that enhances the chocolate
- 1/4 tsp salt: balances sweetness and brings out the chocolate flavor
- 1/4 cup dark chocolate chips: melted for garnish; use semi-sweet or dark for a richer finish
- 2 tbsp chopped nuts: such as almonds or walnuts for crunchy texture; optional, but adds a nice bite
- 1/2 tsp espresso powder: optional, but it intensifies the chocolate flavor beautifully
- 1 tbsp cocoa nibs: optional topping for added crunch and a slight bitterness
When picking out your ingredients for this high protein chocolate mousse, quality matters. A rich cocoa powder and good yogurt will enhance the dish significantly. I recommend looking for Greek yogurt brands that are high in protein and low in sugar for the best results.
Easy Substitutions
- Dairy-free: swap Greek yogurt for coconut yogurt — the mousse will be creamier but may have a coconut flavor.
- Vegan: replace honey with agave syrup — it will keep the sweetness but give a slightly different flavor profile.
- Lower calorie: use low-fat silken tofu instead of full-fat tofu — the texture will remain smooth, but it may be slightly less rich.
How to Make This Recipe
Prep & Mix
In a blender or food processor, combine Greek yogurt, silken tofu, cocoa powder, honey, milk, vanilla extract, salt, and espresso powder if using. This mixture creates the base of your high protein chocolate mousse, giving it a creamy texture and rich flavor.
Blend on high speed for about 1-2 minutes until the mixture is smooth and creamy. You want it to resemble thick pancake batter, which indicates it’s well combined and ready for the next step.
Taste the mousse and adjust sweetness if necessary by adding more honey or maple syrup. Your palate should pick up a pleasureful chocolate flavor balanced with sweetness, so don’t hesitate to tweak it to your liking.
Chill & Serve
Transfer the mousse mixture into individual serving cups or bowls. This makes serving easy and gives each guest their own portion of deliciousness.
Chill in the refrigerator for at least 15 minutes to set. This allows the flavors to meld and the mousse to firm up, enhancing the overall texture.
While the mousse is chilling, melt dark chocolate chips in a microwave-safe bowl in 15-second intervals, stirring in between. This prevents overheating and ensures a smooth drizzle.
Once melted, drizzle the chocolate over the chilled mousse and sprinkle with chopped nuts or cocoa nibs if desired, adding a pleasureful crunch and an elegant touch to your presentation.
Serve immediately or keep chilled until ready to serve. Each spoonful should be velvety and rich, making it a perfect high protein chocolate mousse treat.
Tips & Tricks
Choose Quality Chocolate
When it comes to melting chocolate for your mousse, I always opt for high-quality dark chocolate. The flavor really shines through, making a big difference in the end result. I’ve tried lower quality brands, and honestly, they can leave a waxy aftertaste that distracts from the creamy richness. Look for chocolate with at least 70% cocoa solids for that deep, smooth flavor.
Chill Your Ingredients
For the best texture, I recommend chilling your Greek yogurt and silken tofu before blending. Cold ingredients help the mousse set up nicely and keep it light and airy. I often pop them in the fridge for about 30 minutes before I start. This simple step can prevent the mousse from becoming too runny, ensuring a pleasureful, thick consistency that you’ll love.
Mind the Sweetness
Adjusting sweetness can be tricky, especially with cocoa powder’s bitterness. I always recommend tasting your mixture before chilling it. It’s tempting to add more sweetener after it’s set, but that can lead to an overly sweet mousse. If you find it a bit bitter, a splash of vanilla extract can balance things out beautifully without the need for extra sugar.
Pro Tips
- Use Espresso Powder Wisely: A little espresso powder enhances the chocolate flavor without making it taste like coffee. I usually start with 1/4 teaspoon, blending it in before tasting; adding more can intensify the richness without overpowering the mousse.
- Experiment with Flavor Add-Ins: Consider adding a splash of almond or orange extract for a unique twist. I’ve found that just a teaspoon can enhance the profile, making it more complex and delightful.
- Chill Your Mixing Bowl: For an extra creamy texture, chill your mixing bowl in the freezer for about 10 minutes before blending. This helps maintain the cold temperature of the ingredients, resulting in a smoother mousse.
- Layer with Textured Toppings: Add a layer of crushed nuts, granola, or fresh berries on top before serving. The contrast in texture not only looks beautiful but also adds a pleasureful crunch to each bite.
Variations & Customizations
Flavor Twists
Mint Chocolate
Stir in 1 teaspoon of peppermint extract and garnish with 2 tablespoons of crushed peppermint candies. The result is a refreshing, cool dessert that feels rich and festive, with vibrant green flecks speckled throughout the rich chocolate mousse.
Orange Zest Chocolate
Add the zest of 1 large orange and 2 tablespoons of fresh orange juice to the mixture. This variation brings a bright, citrusy twist that complements the deep chocolate flavor beautifully. The mousse becomes lighter in taste, with a pleasureful burst of orange aroma that lingers.
Unexpected Variations
Chili Chocolate
Mix in 1/2 teaspoon of cayenne pepper or chili powder for a surprising kick. The heat balances the sweetness, creating a complex flavor profile that’s both rich and daring. You'll experience a warm sensation in the back of your throat, making it a thrilling dessert to enjoy.
Peanut Butter Bliss
Fold in 1/2 cup of creamy peanut butter into the mousse. This variation results in a smooth, nutty flavor that adds a rich creaminess. It has a velvety texture that feels like a decadent treat while still being packed with protein!
Storage & Meal Prep
How to Store
Room Temperature
High Protein Chocolate Mousse can sit at room temperature for about 1-2 hours if you're serving it right away. Just be sure to keep it covered with plastic wrap or in an airtight container to maintain its texture and prevent any drying out.
Refrigerator
Store the mousse in the fridge for up to 3 days. Use an airtight container to prevent it from absorbing any odors from your fridge. Make sure to let it cool completely before sealing; otherwise, condensation can form and make it watery.
Freezer
You can freeze the mousse for up to 2 months. To do this, flash freeze it on a sheet pan first, then wrap individual servings tightly in plastic wrap before placing them in a freezer-safe container. When ready to enjoy, thaw it in the refrigerator overnight.
Meal Prep
For optimal prep, I recommend doubling the recipe. You can make it the night before for an easy grab-and-go treat or make a larger batch on the weekend. Store it in individual containers to keep portions fresh, and it will stay good for up to 3 days in the fridge. No reheating needed; just serve chilled for the best texture and flavor!
Equipment You'll Need
Essential
Blender or food processor: A high-speed blender gives you a luxuriously smooth mousse in about 1-2 minutes, which is essential for that creamy texture. If you opt for a food processor, it takes a little longer, and you might end up with tiny lumps that can be charming for some. My favorite is an immersion blender—easy to use and cleanup is a breeze!
Microwave-safe bowl: This is crucial for melting your dark chocolate evenly. A medium-sized bowl allows for easy stirring and prevents the chocolate from seizing. I recommend glass or ceramic for even melting; plastic can sometimes warp or retain heat unevenly.
Nice to Have
Measuring cups and spoons: Precision is key with the ingredients, especially with cocoa and sweeteners. While you can eyeball it, measuring ensures the perfect balance of flavors, which is particularly important for a dessert like this.
Frequently Asked Questions
Can I use a different type of yogurt?
Yes, you can use regular yogurt or even plant-based yogurt, but it may affect the texture. Greek yogurt provides that rich creaminess, so the mousse might be a bit thinner with other types.
Why did my mousse turn out grainy?
Graininess usually comes from improperly melted chocolate. Make sure to melt the chocolate slowly and stir until smooth; if it cools too much, it can seize and create that unwanted texture.
Can I make this mousse ahead of time?
Absolutely! You can prepare the mousse a day in advance and keep it refrigerated. Just give it a gentle stir before serving to fluff it up a bit.
How can I make this mousse dairy-free?
To make this mousse dairy-free, substitute Greek yogurt with a thick dairy-free yogurt, like almond or coconut. You can also add a bit of silken tofu for extra creaminess while keeping it plant-based.
What can I serve with high protein chocolate mousse?
This mousse pairs beautifully with fresh berries, whipped coconut cream, or a sprinkle of nuts for added crunch. A drizzle of caramel or chocolate sauce can also enhance the indulgence factor!
This High Protein Chocolate Mousse is my favorite way to indulge without the guilt — it's rich, creamy, and packed with goodness. For an extra touch, try folding in some crushed berries before serving for a touch of flavor. I'd love to know how yours turns out, so leave a comment or share your creation with me on Pinterest!