
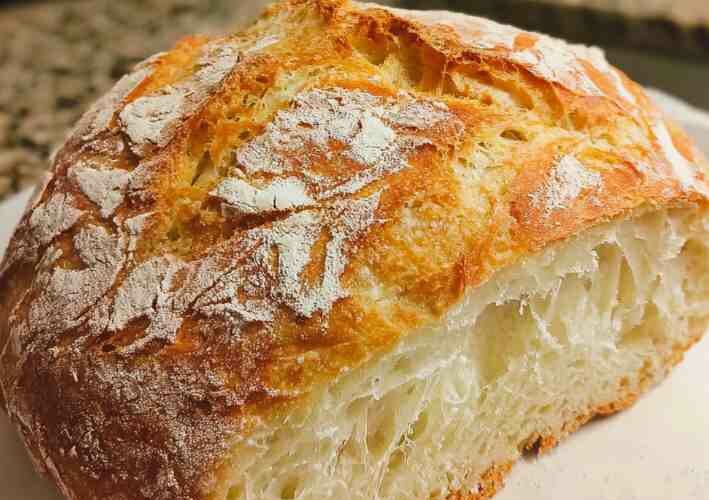
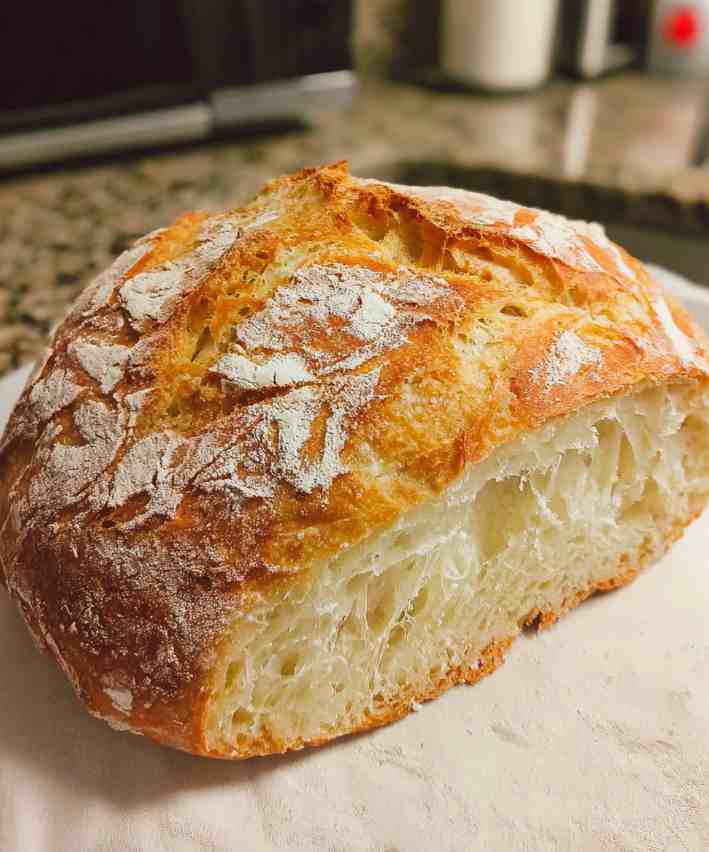
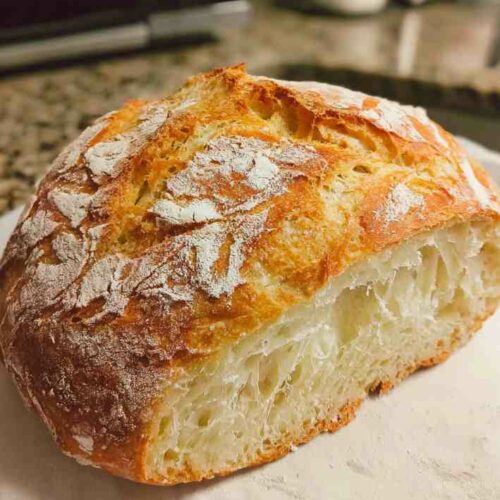
If you’ve ever dreamed of making bakery-style bread at home without spending hours kneading dough, this rustic no-knead artisan bread is the perfect place to start. With just a handful of ingredients, minimal hands-on time, and a long rise that naturally develops incredible flavor, this bread bakes up with a crackly crust, soft interior, and rich aroma. It’s ideal for beginners and seasoned bakers alike—simple, reliable, and absolutely delicious.
Advertisements
Ingredients
- 3 cups (395 g) all-purpose flour or bread flour
- ½ tablespoon kosher salt
- 1 packet (¼ ounce) instant or active dry yeast (2 ¼ teaspoons)
- 1 ½ cups warm water (about 105°F)
Instructions
1. Prepare the Dough
- In a large mixing bowl, whisk together flour, salt, and yeast.
- Pour in the warm water and stir with a dough whisk, wooden spoon, or spatula until the mixture forms a sticky dough.
- Cover the bowl with a clean towel or lightly greased plastic wrap.
- Let the dough rise at room temperature for 2 to 10 hours—or overnight for deeper flavor.
2. Shape the Loaf
- Lightly flour a clean surface.
- Wet your hands to prevent sticking, then gently scrape the dough onto the surface.
- Fold the edges toward the center to form a round loaf (or divide into two smaller loaves).
- Transfer the dough to parchment paper and dust lightly with flour.
- Score the top with 1–4 shallow cuts.
- Let rest for 20–30 minutes.
3. Bake the Bread
- Preheat oven to 450°F (230°C) with a Dutch oven, pizza stone, baking stone, or cast-iron skillet inside.
- Carefully slide the dough (with the parchment paper) onto the preheated surface.
- For a crispier crust, add either:
- 1 cup hot water in a broiler pan, or
- 5 ice cubes to the oven floor to create steam.
- Bake for 25–30 minutes, or until the loaf is deeply golden and crusty.
- Cool on a wire rack for at least 30 minutes before cutting.
Pro Tips
- A longer rise = richer flavor and a more open crumb.
- Keep the dough sticky—aggressive flouring will make the bread dense.
- Steam in the oven boosts crust texture.
- Scoring helps the loaf expand while baking.
- Always let bread cool fully before slicing to avoid a gummy interior.
Why This Recipe Works
- Zero kneading required: Perfect for beginners.
- Only four simple ingredients: Flour, yeast, salt, water.
- Versatile baking options: Works in a Dutch oven, skillet, stone, or pizza pan.
- High hydration dough: Creates an airy, moist crumb with a crisp crackling crust.
- Almost foolproof: Long fermentation does the work for you.
Advertisements
Substitutions & Variations
Flour Options
- Swap half or all of the flour with whole wheat for a rustic, hearty loaf.
Flavor Add-Ins
- Herbs: Rosemary, thyme, garlic powder.
- Seeds: Flaxseeds, pumpkin seeds, sunflower seeds.
- Nuts: Chopped walnuts or pecans.
- Cheese: Fold in shredded cheddar, mozzarella, or parmesan.
- Olives: Add sliced black or green olives for a Mediterranean spin.
Make-Ahead, Storage & Reheating Guide
Make-Ahead
- Prepare dough the night before and let it rise overnight for maximum flavor.
Storage
- Store at room temperature in a paper bag or kitchen towel for up to 2 days.
- For longer storage, slice and freeze in an airtight freezer bag.
Reheating
- Warm frozen or day-old slices in the oven at 350°F for 5–10 minutes.
- A toaster also revives the crust beautifully.
Serving Ideas
- Serve warm with butter or olive oil.
- Pair with soups, stews, or pasta dishes.
- Use as sandwich bread for deli meats, grilled cheese, or paninis.
- Slice thinly for crostini or bruschetta.
Nutrition (Per Serving Estimate)
- Calories: 120
- Fat: 0.5g
- Saturated Fat: 0.1g
- Carbohydrates: 25g
- Fiber: 1g
- Protein: 4g
- Sodium: 200mg
- Sugar: 0.1g
Advertisements
Frequently Asked Questions
How long should the dough rise?
Anywhere from 2 to 10 hours. A longer rise enhances flavor and texture.
Can I use instant yeast instead of active dry?
Yes—both types work perfectly for this recipe.
Advertisements
Do I need a baking stone?
No. A Dutch oven, cast-iron skillet, or pizza stone all work well.
Why is the dough sticky?
This is a high-hydration dough, which is essential for an airy crumb and crunchy crust.
Can I knead the dough?
No kneading is needed—gentle folding during shaping is enough.
Advertisements
How do I get a crustier loaf?
Add steam by using water or ice cubes in the oven.
Can I make small loaves?
Yes. Divide the dough and reduce baking time as needed.
How do I know the bread is done?
The loaf should be golden and sound hollow when tapped on the bottom.
Can I add sweeteners like honey?
A small amount is fine but optional.
Which flour gives the best texture?
Bread flour creates a chewier interior, while all-purpose flour makes a softer crumb.
This rustic no-knead artisan bread proves that homemade bread can be simple, delicious, and incredibly rewarding. With minimal ingredients and hands-off preparation, you can create a bakery-quality loaf right in your own kitchen. Whether you enjoy it warm from the oven, toasted for breakfast, or as the base of your favorite sandwich, this recipe is sure to become a household favorite.
Easy Artisan Bread Recipe
Ingredients
- 3 cups (395 g) all-purpose flour or bread flour
- ½ tbsp kosher salt
- 1 packet (¼ ounce) instant or active dry yeast (2 ¼ teaspoons)
- 1 ½ cups warm water (about 105°F)
Instructions
1. Prepare the Dough
- In a large mixing bowl, whisk together flour, salt, and yeast.
- Pour in the warm water and stir with a dough whisk, wooden spoon, or spatula until the mixture forms a sticky dough.
- Cover the bowl with a clean towel or lightly greased plastic wrap.
- Let the dough rise at room temperature for 2 to 10 hours—or overnight for deeper flavor.
2. Shape the Loaf
- Lightly flour a clean surface.
- Wet your hands to prevent sticking, then gently scrape the dough onto the surface.
- Fold the edges toward the center to form a round loaf (or divide into two smaller loaves).
- Transfer the dough to parchment paper and dust lightly with flour.
- Score the top with 1–4 shallow cuts.
- Let rest for 20–30 minutes.
3. Bake the Bread
- Preheat oven to 450°F (230°C) with a Dutch oven, pizza stone, baking stone, or cast-iron skillet inside.
- Carefully slide the dough (with the parchment paper) onto the preheated surface.
- For a crispier crust, add either:1 cup hot water in a broiler pan, or5 ice cubes to the oven floor to create steam.
- Bake for 25–30 minutes, or until the loaf is deeply golden and crusty.
- Cool on a wire rack for at least 30 minutes before cutting.
Notes
- Allow the dough to rise longer for deeper flavor.
- Whole wheat variations will bake slightly denser.
- Keep dough sticky for the best oven spring.
- Steam is essential for that bakery-style crust.
- Always let the loaf cool before slicing to avoid tearing the crumb.
Advertisements