
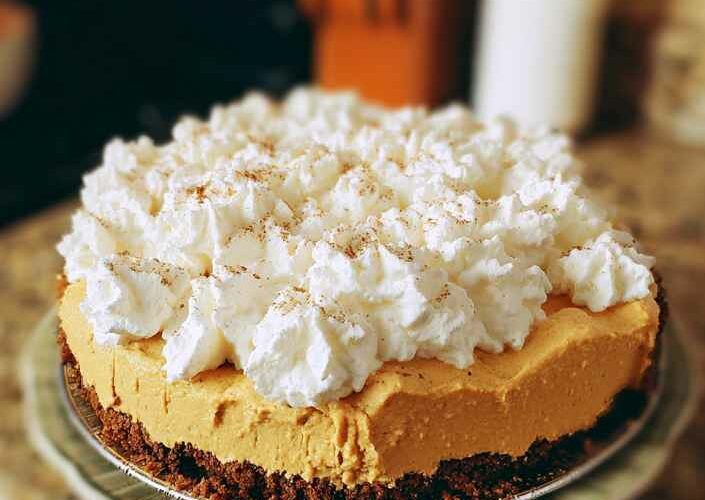
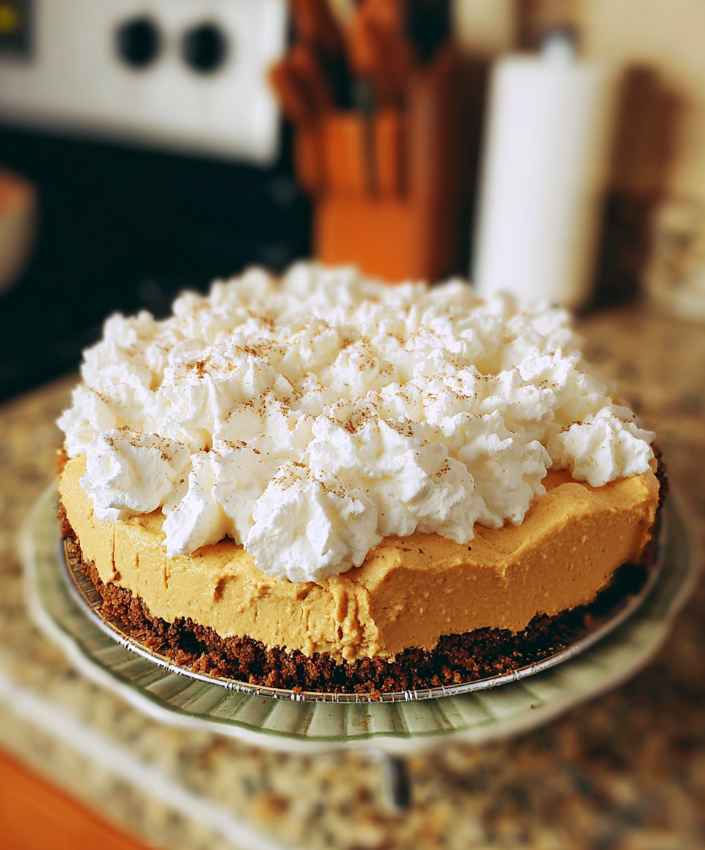
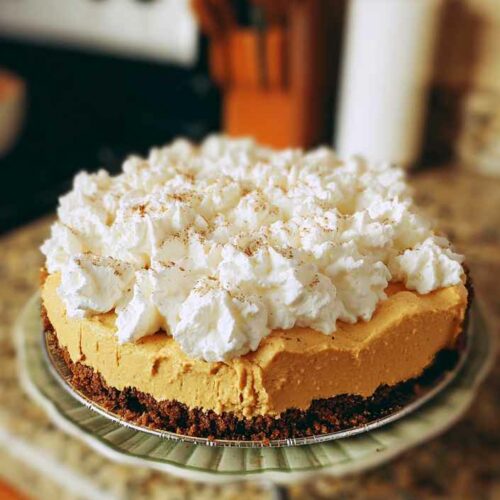
There’s something about the first bite of a silky pumpkin pie that feels like the start of the holidays. The warmth of pumpkin spice, the smooth creaminess, the buttery snap of gingersnaps it’s a quiet kind of magic. This no-bake Pumpkin Silk Pie takes everything you love about classic pumpkin pie and makes it lighter, airier, and let’s be honest a whole lot easier.
Advertisements
Perfect for busy Thanksgiving hosts, last-minute dinner guests, or anyone who’d rather save oven space for the turkey. It’s sweet, spiced, and has that nostalgic flavor you can’t quite stop at one slice.
Advertisements
Ingredients for Pumpkin Silk Pie
Cookie Crust
- 32 gingersnaps (about 1½ cups crushed)
- ¼ cup butter, melted
- ¼ cup granulated sugar
Pumpkin Cream Cheese Filling
- 8 oz cream cheese, softened
- 1 cup powdered sugar
- 1 cup pumpkin puree (not pumpkin pie mix)
- 2 teaspoons vanilla extract
- ½ teaspoon pumpkin pie spice
- 16 oz container of Cool Whip, thawed (or 6½ cups whipped topping)
Garnish
- 2 cups Cool Whip or homemade whipped cream
- ⅛ teaspoon pumpkin pie spice for dusting
How to Make Pumpkin Silk Pie (Step-by-Step)
- Make the Crust:
Finely crush the gingersnaps in a food processor (or in a zip bag with a rolling pin). Stir in the melted butter and sugar until evenly coated. Press the mixture firmly into the bottom of a 9-inch springform pan.
Pro tip: Use the bottom of a glass to get an even, tight crust.
Place the crust in the freezer while you prepare the filling. - Prepare the Filling:
Beat the softened cream cheese with a stand mixer or hand mixer until light and fluffy. Add powdered sugar, pumpkin puree, vanilla, and pumpkin pie spice. Beat again until smooth and creamy. - Fold in Whipped Topping:
Gently fold in the Cool Whip (or whipped cream) until fully combined. The key word here is gently—you want to keep that silky, airy texture. - Assemble the Pie:
Remove the crust from the freezer and spread the pumpkin filling evenly on top. Smooth the surface with a spatula. - Chill & Set:
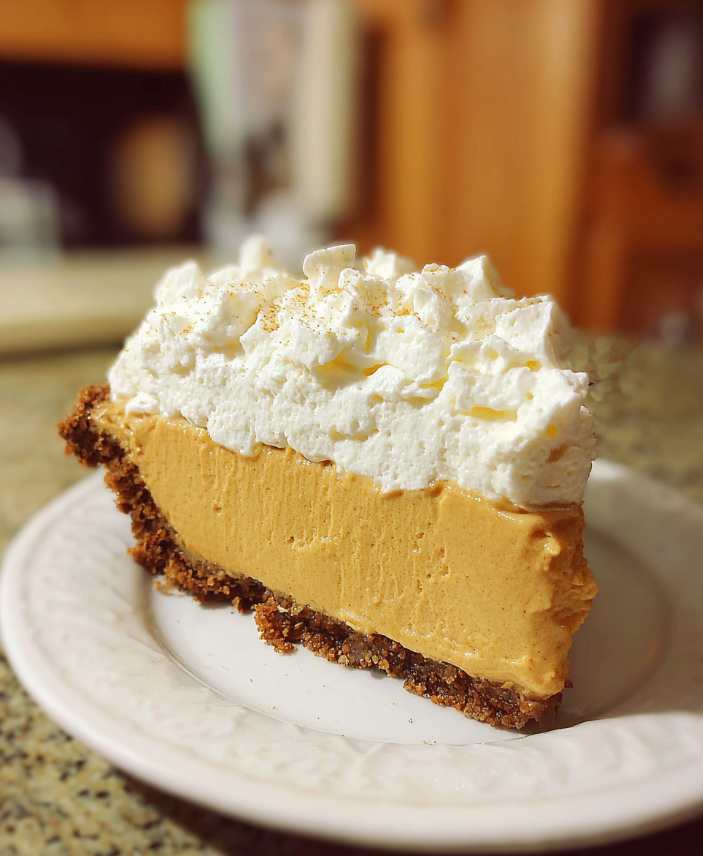
Refrigerate for at least 2 hours, or overnight if possible. The longer it chills, the cleaner the slices will be. - Decorate & Serve:
Once firm, remove the springform sides and top the pie with swirls of Cool Whip or whipped cream. Dust lightly with pumpkin pie spice for that perfect fall finish.
Tips & Tricks for a Perfect No-Bake Pumpkin Pie
- Want a firmer texture? Use 12 oz of Cool Whip instead of 16 oz.
- Make clean slices: Run your knife under hot water between cuts.
- Avoid soggy crust: Always freeze the crust for at least 15 minutes before adding filling.
- For extra depth: Add a drizzle of caramel sauce or crushed candied pecans on top before serving.
Substitutions & Variations
Dairy-Free / Vegan Version
- Use vegan cream cheese (like Daiya or Kite Hill)
- Swap Cool Whip with Coco Whip or whipped coconut cream
- Replace butter with plant-based margarine
Gluten-Free Crust Option
- Substitute gingersnaps with gluten-free ginger cookies or almond flour crust.
Flavor Variations
- Maple Swirl: Add 2 tablespoons of maple syrup to the filling.
- Salted Caramel Crunch: Drizzle caramel and sprinkle sea salt flakes before serving.
- Biscoff Crust: Replace gingersnaps with crushed Biscoff cookies for a cinnamon twist.
Make-Ahead, Storage & Freezing Guide
- Make-Ahead: The pie can be made up to 2 days in advance. Keep it chilled until ready to serve.
- Fridge: Cover with plastic wrap and refrigerate for 3–4 days.
- Freezer: Freeze for up to 2 months. To serve, thaw overnight in the fridge. The texture stays surprisingly creamy.
Frequently Asked Questions
Why did my pie fall apart when sliced?
The pie needs enough chilling time—at least 2 hours, preferably overnight. Too much Cool Whip can also soften the structure. Use 12 oz for a firmer hold.
Can I use fresh pumpkin instead of canned puree?
Yes, but drain it well! Homemade puree has more moisture, which can make the filling loose.
Advertisements
Can I make it without gingersnaps?
Absolutely. Try graham crackers, Nilla wafers, or Biscoff cookies. Each adds its own flavor twist.
Can I use homemade whipped cream instead of Cool Whip?
Yes! One 16-oz tub equals roughly 6½ cups of whipped cream. Beat 2½ cups of heavy cream with ¼ cup powdered sugar until stiff peaks form.
Advertisements
Nutrition Facts (Per Slice)
| Nutrient | Amount |
|---|---|
| Calories | 266 kcal |
| Carbohydrates | 32 g |
| Protein | 3 g |
| Fat | 14 g |
| Saturated Fat | 9 g |
| Cholesterol | 23 mg |
| Sodium | 173 mg |
| Fiber | 1 g |
| Sugar | 23 g |
| Vitamin A | 2690 IU |
Final Thoughts
There’s something deeply satisfying about serving a dessert that looks fancy but takes almost no effort. This Pumpkin Silk Pie is that kind of recipe it wows your guests, disappears in minutes, and somehow feels like fall itself.
If you make it, take a photo before it’s gone (trust me, it vanishes fast). Then leave a review or share it with someone who swears they “don’t like pumpkin pie.” This one might just change their mind.
No-Bake Pumpkin Silk Pie Recipe | Light, Creamy & Easy Dessert
Ingredients
Cookie Crust
- 32 gingersnaps (about 1½ cups crushed)
- ¼ cup butter, melted
- ¼ cup granulated sugar
Pumpkin Cream Cheese Filling
- 8 oz cream cheese, softened
- 1 cup powdered sugar
- 1 cup pumpkin puree (not pumpkin pie mix)
- 2 tsp vanilla extract
- ½ tsp pumpkin pie spice
- 16 oz container of Cool Whip, thawed (or 6½ cups whipped topping)
Garnish
- 2 cups Cool Whip or homemade whipped cream
- ⅛ tsp pumpkin pie spice for dusting
Instructions
Make the Crust:
- Finely crush the gingersnaps in a food processor (or in a zip bag with a rolling pin). Stir in the melted butter and sugar until evenly coated. Press the mixture firmly into the bottom of a 9-inch springform pan.
- Pro tip: Use the bottom of a glass to get an even, tight crust.
- Place the crust in the freezer while you prepare the filling.
Prepare the Filling:
- Beat the softened cream cheese with a stand mixer or hand mixer until light and fluffy. Add powdered sugar, pumpkin puree, vanilla, and pumpkin pie spice. Beat again until smooth and creamy.
Fold in Whipped Topping:
- Gently fold in the Cool Whip (or whipped cream) until fully combined. The key word here is gently—you want to keep that silky, airy texture.
Assemble the Pie:
- Remove the crust from the freezer and spread the pumpkin filling evenly on top. Smooth the surface with a spatula.
Chill & Set:
- Refrigerate for at least 2 hours, or overnight if possible. The longer it chills, the cleaner the slices will be.
Decorate & Serve:
- Once firm, remove the springform sides and top the pie with swirls of Cool Whip or whipped cream. Dust lightly with pumpkin pie spice for that perfect fall finish.
Advertisements
Advertisements