
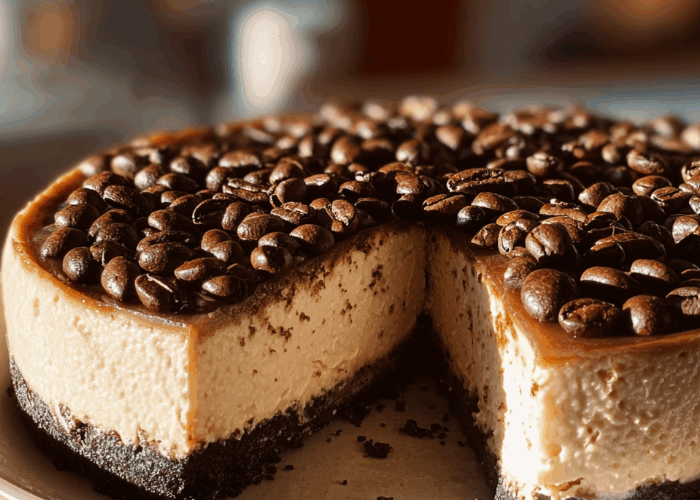
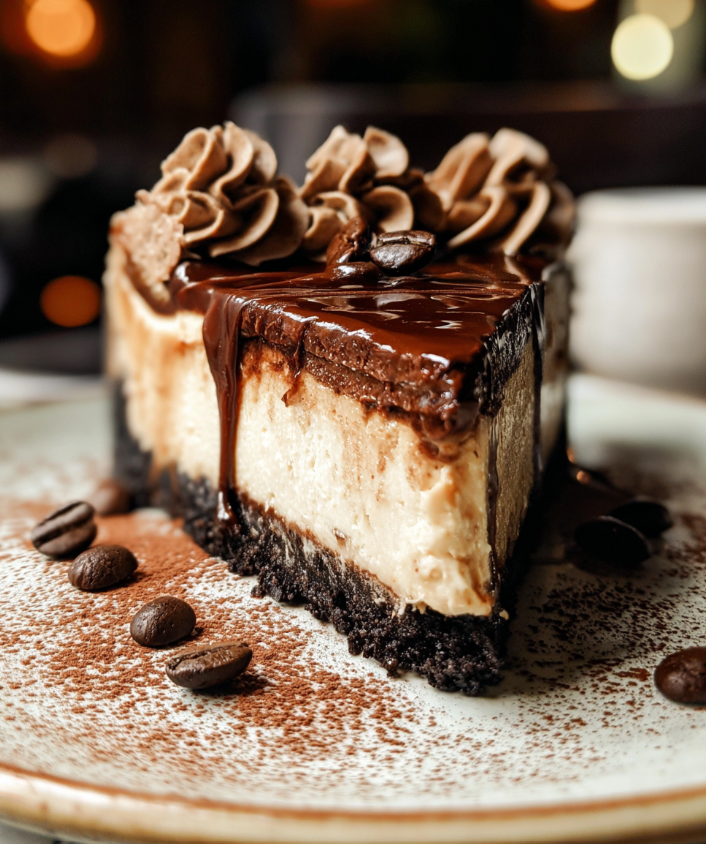
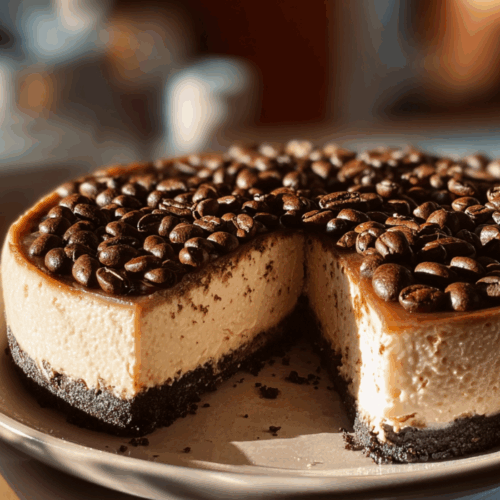
Craving a dessert that feels like a café indulgence but looks like it came from a pastry shop? This Espresso Cheesecake blends the bold kick of coffee with the smooth decadence of cheesecake and a glossy chocolate ganache on top. It’s rich without being overwhelming, elegant yet comforting, and the kind of dessert that makes people say, “Wait, did you actually make this at home?”
Advertisements
Perfect for coffee lovers, dinner parties, or simply those moments when you want to elevate your cheesecake game, this recipe is both achievable and impressive.
Advertisements

Ingredients
For the Crust
- 2 cups Oreo cookie crumbs (about 24 cookies, filling removed)
- 4 tablespoons unsalted butter, melted
For the Espresso Cheesecake Filling
- 3 packages (8 oz each) cream cheese, softened to room temperature
- 1 cup granulated sugar
- 1 teaspoon vanilla extract
- 1/3 cup brewed espresso (strong coffee works too)
- 3 large eggs
- Optional: whole espresso beans for garnish
For the Chocolate Ganache
- 1 cup semi-sweet chocolate chips
- 1/2 cup heavy cream
Instructions
Step 1: Make the Crust
- Preheat oven to 350°F (175°C).
- Crush Oreos into fine crumbs (food processor or bag + rolling pin).
- Mix crumbs with melted butter until evenly coated.
- Press firmly into the bottom of a 9-inch springform pan.
- Bake for 10 minutes, remove, and let cool. Lower oven to 325°F (160°C).
Pro Tip: Use the back of a measuring cup to press the crust evenly for a solid base.
Step 2: Prepare the Cheesecake Filling
- Beat softened cream cheese until smooth and creamy.
- Add sugar and vanilla, mixing until fully combined.
- Pour in brewed espresso and mix gently.
- Add eggs one at a time, mixing just until incorporated (avoid overbeating).
- Pour filling over the cooled crust and smooth the top.
Step 3: Bake the Cheesecake
- Place the springform pan inside a larger baking dish.
- Add hot water to the outer dish (about 1 inch high) to create a water bath.
- Bake at 325°F (160°C) for 65–85 minutes, until edges are set and center is slightly jiggly.
- Turn off oven, crack the door open, and let cheesecake cool slowly for 1 hour.
Step 4: Make the Ganache
- Heat cream until it just begins to simmer.
- Pour hot cream over chocolate chips in a heatproof bowl.
- Let sit 1–2 minutes, then stir until smooth and glossy.
- Cool 5–7 minutes before pouring over cooled cheesecake.
Step 5: Chill & Serve
- Refrigerate cheesecake for at least 4 hours, preferably overnight.
- Remove springform sides, garnish with espresso beans, and slice with a hot knife for clean edges.
Tips & Tricks
- Don’t overbeat the batter—too much air leads to cracks.
- Slice with a knife dipped in hot water for perfect edges.
- Serve chilled; the texture is best when cold and firm.
Substitutions & Variations
- Vegan version: Use vegan cream cheese, coconut cream instead of heavy cream, and dairy-free chocolate.
- Gluten-free crust: Swap Oreos for gluten-free cookies.
- Flavor twist: Add a tablespoon of cocoa powder to the filling for mocha cheesecake, or drizzle with caramel before serving.
Frequently Asked Questions
Can I use instant coffee instead of espresso?
Yes, dissolve 1–2 teaspoons of instant espresso powder in 1/3 cup hot water for a strong flavor.
Advertisements
How long does espresso cheesecake last in the fridge?
Up to 5 days when tightly wrapped or stored in an airtight container.
Can I freeze this cheesecake?
Absolutely. Wrap the cooled cheesecake (without ganache) in plastic wrap + foil and freeze for up to 2 months. Add ganache after thawing.
Advertisements
Do I need a water bath?
Yes, it prevents cracks and keeps the cheesecake creamy. But if you skip it, just know the top may be less smooth.
Nutrition Information (per slice, 1 of 10)
- Calories: ~460
- Fat: 32g
- Carbohydrates: 37g
- Protein: 7g
- Sugar: 28g
(Values may vary based on brands used.)

This Espresso Cheesecake Recipe is the ultimate blend of creamy indulgence and bold coffee flavor. Between the buttery Oreo crust, velvety espresso filling, and glossy ganache topping, it’s a dessert that looks bakery-perfect but feels homemade. Serve it at your next gathering, or just treat yourself with a slice and a hot cup of coffee. Either way, it’s a dessert worth remembering.
Advertisements
If you try this recipe, let me know how it turned out, or share your own twist (like mocha or caramel versions). Happy baking!
Espresso Cheesecake Recipe (Rich & Creamy Coffee Dessert)
Ingredients
For the Crust
- 2 cups Oreo cookie crumbs (about 24 cookies, filling removed)
- 4 tbsp unsalted butter, melted
For the Espresso Cheesecake Filling
- 3 packages (8 oz each) cream cheese, softened to room temperature
- 1 cup granulated sugar
- 1 tsp vanilla extract
- 1/3 cup brewed espresso (strong coffee works too)
- 3 large eggs
- Optional: whole espresso beans for garnish
For the Chocolate Ganache
- 1 cup semi-sweet chocolate chips
- 1/2 cup heavy cream
Instructions
- Prepare the Crust– Preheat oven to 350°F (175°C).– Mix Oreo crumbs with melted butter.– Press into a 9-inch springform pan.– Bake 10 minutes, then cool. Lower oven to 325°F (160°C).
- Make the Filling– Beat cream cheese until smooth.– Add sugar, vanilla, and espresso; mix well.– Add eggs one at a time, mixing just until combined.– Pour over crust and smooth top.
- Bake the Cheesecake– Place pan in a larger dish with hot water (water bath).– Bake 65–85 minutes at 325°F (160°C), until edges are set and center slightly jiggles.– Turn off oven, crack door open, and let cool 1 hour.
- Make the Ganache– Heat cream until it simmers.– Pour over chocolate chips; let sit 1–2 minutes.– Stir until smooth, then cool 5 minutes.
- Finish & Chill– Pour ganache over cooled cheesecake.– Refrigerate at least 4 hours or overnight.– Garnish with espresso beans, slice, and serve chilled.
Notes
- Room Temperature Matters: Make sure cream cheese and eggs are fully softened/at room temperature — this ensures a smooth, lump-free filling.
- Avoid Cracks: Don’t overbeat the batter; mix eggs in gently and use a water bath for best results.
- Flavor Boost: For stronger coffee flavor, increase espresso to ½ cup, but note it may slightly soften the texture.
- Ganache Tip: Let the ganache cool for a few minutes before pouring so it spreads evenly without melting the cheesecake surface.
- Slicing Cleanly: Run a sharp knife under hot water, wipe clean, and repeat between slices for bakery-style cuts.
- Storage: Keeps 4–5 days in the fridge, or up to 2 months in the freezer (wrap tightly; add ganache after thawing).
Advertisements